Sunday 29 January 2012

Mini Cross Stitch

I love cross stitch but so far I have found that I don't have the patience for the bigger pieces so stick to small patterns that are fairly easy to complete.

I have a friend who is completely crazy about birds, she loves them and anything to do with them so when I saw a cross stitch of a little chick with a worm in my local craft shop a few weeks ago I bought it straight away.


I managed to complete the whole cross stitch in about 4 hours which I don't think is too bad for a beginner. I haven't decided what I am going to do with the cross stitch yet I want to make it into either a cool pressie or card for my bird crazy friend. I will have to get my thinking cap on.

Friday 27 January 2012

Time....

I wish there was more time in a week. In the last couple of days work has been super busy so I haven't found as much time to craft as I would like. I have so many ideas buzzing around my head but haven't had chance to get properly working on any of them which is so frustrating. Does anyone else find this any super solutions for really portable crafts that could be done on the commute to and from work?

One of the ideas I have been floating around is doing something creative with some of my photos, I love to travel and am lucky enough to have been to some amazing places all over the world. I love to take photos much to the annoyance of my traveling companions so usually end up with hundreds of pictures from each place. I thought about scrapbooking these photos but I'm not sure I would re look at the books very often I was thinking of doing some sort of wall art framed montage type thing ( a bit vague I know any ideas or suggestions would be greatly appreciated)

I thought I would end this post with a few of my favorite pics from this years travels which included a tour of Morocco and a Rhine Cruise.


Wednesday 25 January 2012

WOYWW 25th January

Last week I managed to get around to about 80 of the other desks, and loved looking at the huge range of stuff on them so many ideas flowing for things I want to make and things I want to buy. It's really great that so many people visited my blog too, as someone fairly new to craft its brilliant to get so many lovely comments, tips and advice from other crafters.

Inspiration from Making Magazine

Felt! 

My desk this week has been filled with a whole array of needle-craft materials as you can see. I was inspired by a project in Making magazines January issue and decided to give it my own twist. I have been making a felt flower decoration but decided to make them into flower people as a fun desk decoration.

1930s book on needlecraft

This involved cutting out a range of different sized circles from felt and then sewing them together before attatching a pipe cleaner and placing them into a piece of floral foam in an old candle pot which I decorated with some fake grass I made. I managed to master blanket stitch for the first time which I was reallly impressed with. As you can see I have a very old needlework book which I think was actually published in the 1930s I got it from an antiques fair a few months ago, as well as being beautiful to look at it also has some really easy to follow instructions for all the various stitches.
googley eyes! 


I have a huge collection of googley eyes and managed to use some on this project, I think they add a great element of fun to most designs and am really happy with the way they have turned out here. I can't wait to put this fun flower pot ontp my desk at work and brighten up the otherwise mundane office.

This week I am going to attempt to make it round to all the desks over at Julia's wonderful blog, cant wait to see what you have all been up to.
Competed project :) 

Tuesday 24 January 2012

Sewing Box

I have been working on a little needlecraft project, I am only part way finished so going to do a separate post on it in the next few days, keep your eyes peeled.

So today's post is just a a quick one showing off my fab sewing box. It was a present for xmas and its great all my sewing stuff is super organized in it and its really pretty.

The first section of the box is filled with tools, needles, a few buttons and sewing machine accessories. The second layer as you can see is a bit of an Aladdin's cave filled with cross stitch kits, embroidery thread, basic thread, wool, knitting needles a bit of everything really.


Although I am not the neatest needleworker I really enjoy making different sewing projects and trying to master different things. I prefer to sew on my sewing machine then hand sew but I think some of the effects you can get with hand sewing are definitely worth the extra effort. So keep your eyes peeled for my exciting new needlework project that should be finished in the next couple of days.

Monday 23 January 2012

Origami

I was flicking through my Martha Stewart Craft Encyclopedia earlier looking for a quick project/technique to try whilst sitting in front of the TV. There are so many amazing projects in the book that I want to try but quite a lot of them will need extra stash so I decided to give Origami a go.

There were a number of different Origami projects in the book varying from beginner level to frankly hardcore paper folding genius level. I decided to give some beginner projects a go and went with the fortune teller and chinese lantern makes.

I started with the fortune teller, I remember we used to make these at school and have great fun playing with them on the playground. Martha's book suggests using them at dinner parties as table decorations one for each guest which I think is a great idea.

I then made a chinese lantern which can be hung over fairy lights to give a great effect. Both of these were fairly easy to make I think they would look slightly better if I had used a bone folder to get more accurate folding. As you can see I used some left over xmas papers I had and I think when folded they look less xmasy and can be used for any occasion so great for using up and left over festive stash.

Sunday 22 January 2012

Poundland Storage Solutions

Lots of lovely crafters have given me advice on the best way to store all my new found craft stash and quite a few people have suggested popping to Poundland for some super inexpensive craft storage solutions.

I went in earlier and found these amazing baskets for a £1 which I think are great for storing my promarkers in for the time being. I have seen some very elaborate storage solutions which I really love but for the time being I want to be spending money on more stash and not storage.

I got a great suggestion earlier which was to put elastic bands around the different colour families so that the colours which blend together are all stored together and easy to locate so thats my job for tomorrow.

Saturday 21 January 2012

Teddy Bear Card

Today I spent my day reorganizing and tidying most of my flat, yes it is as boring as it sounds. The flat is super tidy and organized now though so I rewarded myself with some chill out craft time this evening.

I have been colouring in a few of my digi stamps so I have a supply of ready coloured images to use when wanting to make a card quickly. I made one card tonight using a cute teddy bear stamp.
I coloured and shaded the bear using my pro markers and then cut him out using my scissors and craft knife, Im thinking of investing in some of those special decoupage scissors as it so fiddly doing it with the big scissors and knife. I also cut out the heart shaped balloons separately. I used some of the airmail style paper from the Portobello Road collection and cut this to form a large strip down the centre of my cardstock.  I stuck the bear on and then used 3D foam pads to attach the balloons so they had a sort of floating effect. I then found some old elastic that I had laying around in my sewing box and stuck this on with pva glue to make the balloon strings. Overall I am happy with this card I really feel like I am getting better at this whole crafting thing :) Not sure if this card needs something else though, it just feels like something is missing from it not sure what though, any suggestions?

I am going to be entering this card into the I love Promarkers challenge which this week is an anything goes theme.

Friday 20 January 2012

Scarf update

So this was meant to be a quick post to update you on the progress of my scarf. Unfortunately progress has almost ground to a halt as the stitches have got so tight that it is impossible to knit the next row. I think I'm going to do a bit more reading on knitting and then start again on a whole new scarf.

Tonight I have been having a bit of a spring clean of my flat and tidied the living room, kitchen and bathroom I have been epically busy since November last year that a good sort out was long overdue. This didn't leave me much time for crafting but I managed to cram in half an hour or so of creative time before bed.
As the scarf was a complete no go I got out my promarkers. I had printed out some more digi stamps earlier in the evening which I am planning to use to make some cards, some for particular occasions but some for challenges which I am becoming addicted to. I just love making cards for the challenges but also love seeing how other people have interpreted the theme.


I love using my pro markers I find it really relaxing to just sit and colour in the different images. I mainly do animals but am trying to learn how to get skin tones correct so tonight have been working on this cute stamp of a girl with a cupcake. It's still not finished got a bit too tired to concentrate on it, am going to finish that off tomorrow.

Wednesday 18 January 2012

WOYWW 18th Jan

Last week I managed to visit pretty much all the WOYWW links over at Julia's brilliant blog I really enjoyed looking at the work everyone was getting started with in 2012.

I still have no proper crafting desk and this week for some reason I have been working on the floor its actually really comfortable and gives me plenty of space to make a mess in! So here's a look at what's going on on my desk/floor this week.

As you can see the floor has sort of been taken over with crafting. In the top left I have one of my storage boxes which I use to keep all my various adhesives and scissors and craft knives in. In the middle is one of my smaller storage boxes which contains my alphabet stamps and quilling papers.  I also have two excellent craft books out one is Martha Stewart's craft encyclopedia and the other is Craft Wisdom and Know How. Both these books are perfect for newbie crafters lots of hints, tips, tutorials and fun projects to get started with. I also have my dinner in the top right I love to craft whilst chilling out over dinner hence the pizza in this photo.

As you can see I had been reading about the art of quilling. It was a technique I had never tried before so decided that I would practice a few of the shapes that were shown in various books to see if I could get the hang of it before using it on a card, this way if I wasn't any good at it I wouldn't mess up a card. Both books offer step by step instructions for various shapes so I got my quilling papers out along with the quilling tool and started practicing.
The technique is a little fiddely but very fun to see how easy it is to make a whole range of shapes some more complicated than others. The 3D effect looks great too and I have tons of ideas of how I can use quilling on cards and other crafty makes now I have got the hang of it.


I made a wide range of different shapes including a flower, teardrop, scroll, heart and various circles. I think the effect is ace and cant wait to try different shapes and papers. So yes this week my desk is filled with quilling and for anyone that hasn't tried this technique yet give it a go it really is great fun. This is what I love so much about crafting such a huge array of new skills to learn and master, I look forward to getting round all your desks this week and finding new techniques, crafts and projects that your all doing and giving them a go myself.


Monday 16 January 2012

Quick Card

Tonight I made a quick card to enter in to the latest challenge on the I love Promarkers blog. I had to get  the train to work at 7am this morning so by the time I got round to crafting time I was pretty tired so decided to work on a quick and simple design.

I used Promarkers to colour in a cute image of a hamster eating a cupcake and then added a little bit of shading to the image. I then cut this image out and decided it would look best on a slightly unusual size card. I cut my cardstock down to make a 15cm by 15cm square and then folded this in half. I then covered one side of the card with some super cute cloud paper. I positioned the hamster in one corner of the card attached a chip board sentiment and some heart shaped buttons in various colours.
Overall considering this is only about the fifth card I have made I'm really happy with the way this card has turned out. It only took me about an hour to make and was a nice chill out activity after a long day in the office.

Sunday 15 January 2012

Starting the Scarf

So this morning I finally started knitting my scarf. I have chosen a grey wool which I love becuase it varies in shade of grey throughout the wool so hopefully will give a nice effect when I finish the entire scarf.

I am kind of expiermenting as I go with this project, so instead of following any sort of knitting pattern I started by casting on 50 knit stitches. I am then just knitting rows each with 50 stitches not really sure how many rows I will need so just going with the flow.

When knitting I seem to encounter the problem of getting the stitches to tight which makes it difficult to attach the next row, going to have a browse on the internet see if I can find out where I am going wrong and rectify it. In the end got distracted with some shopping and cinema today so only ended up doing three rows but at least it's a start. Im determined to have a new scarf by next christmas!
Scarf so far.....long way to go! 

Friday 13 January 2012

Lantern Making (Part Two)

The lanterns I was making earlier in the week are now dry, tonight I put some small tealights in them to test them out and I am really happy with the effect they give off. For the moment I am going to use them as candle holders and have them on the work surface.

I made the little one I showed you in part one of this post earlier in the week, and after I left it to dry I had enjoyed it so much that I made another one. This time only using two colours of tissue paper red and blue. When the summer comes I plan to attach wire to the jars and hang them outside when having BBQs and outside parties.

I am going to try this technique with a range of different shaped jars and try them with various candles to experiment with the different light effects that can be achieved. I also read that you can use pro markers to colour on glass and give a stained glass effect which I am quite excited to try. So watch this space for more lanterns in the future.

Thursday 12 January 2012

Which Craft Magazine to Choose?


Since getting interested in craft, I have become a regular reader of various craft magazines. I have tried a whole range of magazines varying from quick cards to simply homemade.

I have read on a number of blogs that people haven’t always found craft magazines useful and that often they feel it is the same material and projects being re written in various different ways. I however feel that as a newbie to a craft world reading a variety of magazines has been invariably useful its fun to look at what other people are doing and is interesting to read reviews of new products.

I have got inspiration on various card designs from different paper craft magazines and learnt how to use different techniques such as quiling and decoupage. I also have marked a number of knitting and needle craft projects to try in the coming months.

The most useful magazines I have found are the more general ones which cover a huge variety of crafts ranging from gardening to crochet. Although I am not particularly interested in the gardening or baking sections I like the breadth of projects included in these types of magazines I also like the more varied articles on things such as setting up a craft business and upcycling. Of these more general magazines I have been a big fan of simply homemade and making magazine. They are both priced at 4.99 and are published monthly.

I also have enjoyed the more specific magazines such as cross stitch crazy and lets knit although they are filled with information about only one craft they are very informative and give a huge variety of articles within them.
Ever growing collection of craft magazines 

As it is January it is the time to be thinking about getting a subscription to my favourite magazines lots of them seems to be offering deals if you become a subscriber the only problem is deciding which ones to subscribe to. If any one has any suggestions on their favourite craft magazines please leave a comment and let me know.

Wednesday 11 January 2012

Lantern Making (Part One)

I read a huge number of craft blogs I can spend whole evenings stumbling from one link to another. During my blog hopping I often get inspiration on new projects or techniques to try. 

Recently I have seen a number of people make lanterns using old jars and tissue paper. I decided I would give it a go. I bought a barganous huge pack of tissue paper when I first started crafting but haven't really used that much of it so this was the perfect project to use some with. 

I started by using a star punch to punch little stars out of tissue papers scraps, I then stuck about 6 of these pieces onto the jam jar I then layered on other bits of tissue paper using PVA glue. Once they were all stuck on I left it to dry for 20 mins before then coating it again with PVA glue. 

This is as far as I have got this evening I am going to leave it over night to dry and then finish it off tomorrow hence this os only part one of the post. 
Lantern in progress 


WOYWW

So last week whilst blog hopping I stumbled across this fantastic post where each Wednesday crafters from all over the world congregate on Julia's blog to share pictures of their work desks and the a particular projects they have on them on that Wednesday.

I only discovered the blog a few days ago and have to admit that I have been hooked ever since. It is so interesting to see how other people organise their work spaces, its also great to see that the people that post vary from novice crafters like me to some real craft artists whose work just amazes me.     

So far I don't actually have a desk solely for craft so kind of just spread out in the kitchen or lounge. This week I have been working on Thank You cards and decided to do something a bit unconventional so have done a thank you card with a panda on. As you can see from the first picture I used my large collection of pro markers to colour in the digi stamp.

I store my promarkers in a old sweet tin and to be honest its not great it is hard to find which colour I am looking for and its impossible to keep the pens in colour groups which makes it quicker to get the colours needed for blending. Some sort of storage solution needs to be purchased asap. 

As you can see from the above picture my desk gets a bit messy when I am fully immersed in a project. In the background you can see a pad of multi coloured card stock which I purchased in Lidl at the weekend it was a bargain at 1.99 for a pack of 25 sheets. You can also see my self healing cutting mat which I love I use it for everything not just cutting, it makes it much easier to tidy up when I am done if all the bits and bobs are on the mat. You can also see double sided sticky tape which I think every crafter is a little bit in love with, and my craft knife and scissors which I used to cut out all the elements of my digi stamp.

This is the final card not 100% happy with it but pleased as its the first card of this type that I have made. I used a digi stamp which I cut into individual elements and mounted them on different levels of my folded piece of card. The bamboo canes were fiddely to cut out so I don't think they look as neat as I would like. The sentiment circle I did in green and then added stamps I think it would look more effective in a purple colour rather then blending in with the foliage in the rest of the image. I added some glitter glue to the card to make it a bit more interesting. Overall I like the image but think the way I have set up the card could be better I think I would give it 6/10.

I look forward to looking at what everyone else has on there desk this Wednesday.

Sunday 8 January 2012

Thank You Card

I have started making Thank You cards for sending out to thank people for the lovely presents I got for xmas.

I used pro markers to colour in the image and used an old red xmas paper as well as the blue paper from the new Potabello Road paper collection. I cut the image out using pinking sheers to add a bit of interest to the edge of the image. I then stamped a sentiment using my new alphabet stamps. Overall really happy with this card its quite a simple design but I think its really effective.

I am entering this card into the passion for pro markers Thank You Card challenge. http://promarkerchallenge.blogspot.com/

Craft New Years Resolutions


Seeing as it is the time for New Years resolutions I have decided to compile a list of crafts I want to try and projects I want to complete over the next 12 months.
I’m sure as the year progresses this list will change and involve but have decided it will be a good starting point for deciding what projects to work on.

  •            Quilting – I think home made quilts look beautiful and have been reading about quilting techniques in a craft book I purchased recently (review to follow in another post) It looks like its one of those crafts that can be made as easy or as difficult as you want so I think I’m going to attempt to make a basic quilt to use as a throw on my sofa.
  • ·      Glass Painting- In the December issue of ‘Simply Homemade’ I saw a project which involved decorating tumblers and simple glass plates or dishes with various designs. I think it would be fun to do this and think it would make good gifts I know a lot of my friends would love a hand-painted glass item.
  • ·      Copic Markers- As I have said before I have a fairly sizeable collection of pro markers which I love using they really give a great effect if you spend the time on the images perfecting them. I am intrigued however to try Copic markers and see which I prefer, in a number of the online articles I have read about them it has stated that they are interchangeable with the pro markers and can be used together so I think I may buy a few and do a Copic vs Promarker article.
  • ·      Freehand machine embroidery – I purchased a few hand embroidery foot for my sewing machine but unfortunately when attached it doesn’t fit an embroidery hoop underneath. I am going to purchase another foot that will allow a hoop underneath and give it a go. In an ideal world I would like to buy a new sewing machine as the one I have is fairly old I think it may be five or six years old now, it does however still work pretty much perfectly but doesn’t have all the settings or attachments I would like. It’s a Toyota sewing machine but I think I would prefer a Janome or Singer. I think before jumping into a new purchase I will try and complete some more projects on my current sewing machine and decide if it really needs replacing.
  • ·      Crochet- I have seen a number of projects in my knitting and crochet magazine that I would like to have a go at. I have been told that crochet is a little harder to master then knitting so not sure how easy I will find it as knitting was a little bit tricky. Going to start with a few granny squares and hopefully will get enough together to make a blanket.
  • ·      Mosaic- On one of the episodes of Kirsty’s handmade Britain she completed a Mosaic mirror it was beautiful and looked like a very enjoyable craft. I am going to first try one of the small kits that Hobbycraft sell for about £3 as I think this is a cheap way of seeing whether I like the process of making a mosaic. If I do I will invest in a few of the basic materials needed to get started on a larger project.
  • ·      Card making – Although this is not a new craft I would like to try it is something that I would like to further experiment with. There are so many different techniques out there that I think look really great on cards for all occasions so I am going to try and give as many a go as possible. I also am determined to make sure that I start to do cards further in advance so I have more time to make sure each one is perfect before it has to be given out. I plan to start on Easter cards in the next week or so.

I’m sure I could think of a lot more crafts and techniques I want to try but this post is already fairy lengthy. I have decided that at the end of each month I wil do a sort of catch up post which will evaluate how I am getting on with trying these different crafts so hopefully come the end of January I will be able to cross a few of the above of the list. 

Stash Storage


As I mentioned in a previous post over the last two months I have amassed a huge amount of stash for a whole range of crafts. I seem to be one of those people that when I take up a hobby I really go for it.
I had been storing all this stash in various ice cream tubs and larger crates as well as just piled up on the floor. This meant it was right faff to find what I was looking for and wasn’t good for keeping things neat tidy and organised.
Most of my stash in some sort of order

Over Christmas I was lucky enough to receive a beautiful sewing box which I have used to store all my embroidery, cross stitch and sewing machine accessories in. This means it is much easier to locate exactly what I am looking for and all the threads are organised by colour and all the needles by size.
I also received a small draw system that included four draws that were all split into little sections. The sections were variable in size because you could move the dividers around to suit what you needed. The top of the draw section also opens up to reveal a large compartment.
Sewing box 


I have used this to store embellishments of varying kinds and some stamping materials. I had amassed a huge amount of sequins, beads, buttons, stickers etc. which I split up into each of the sections.
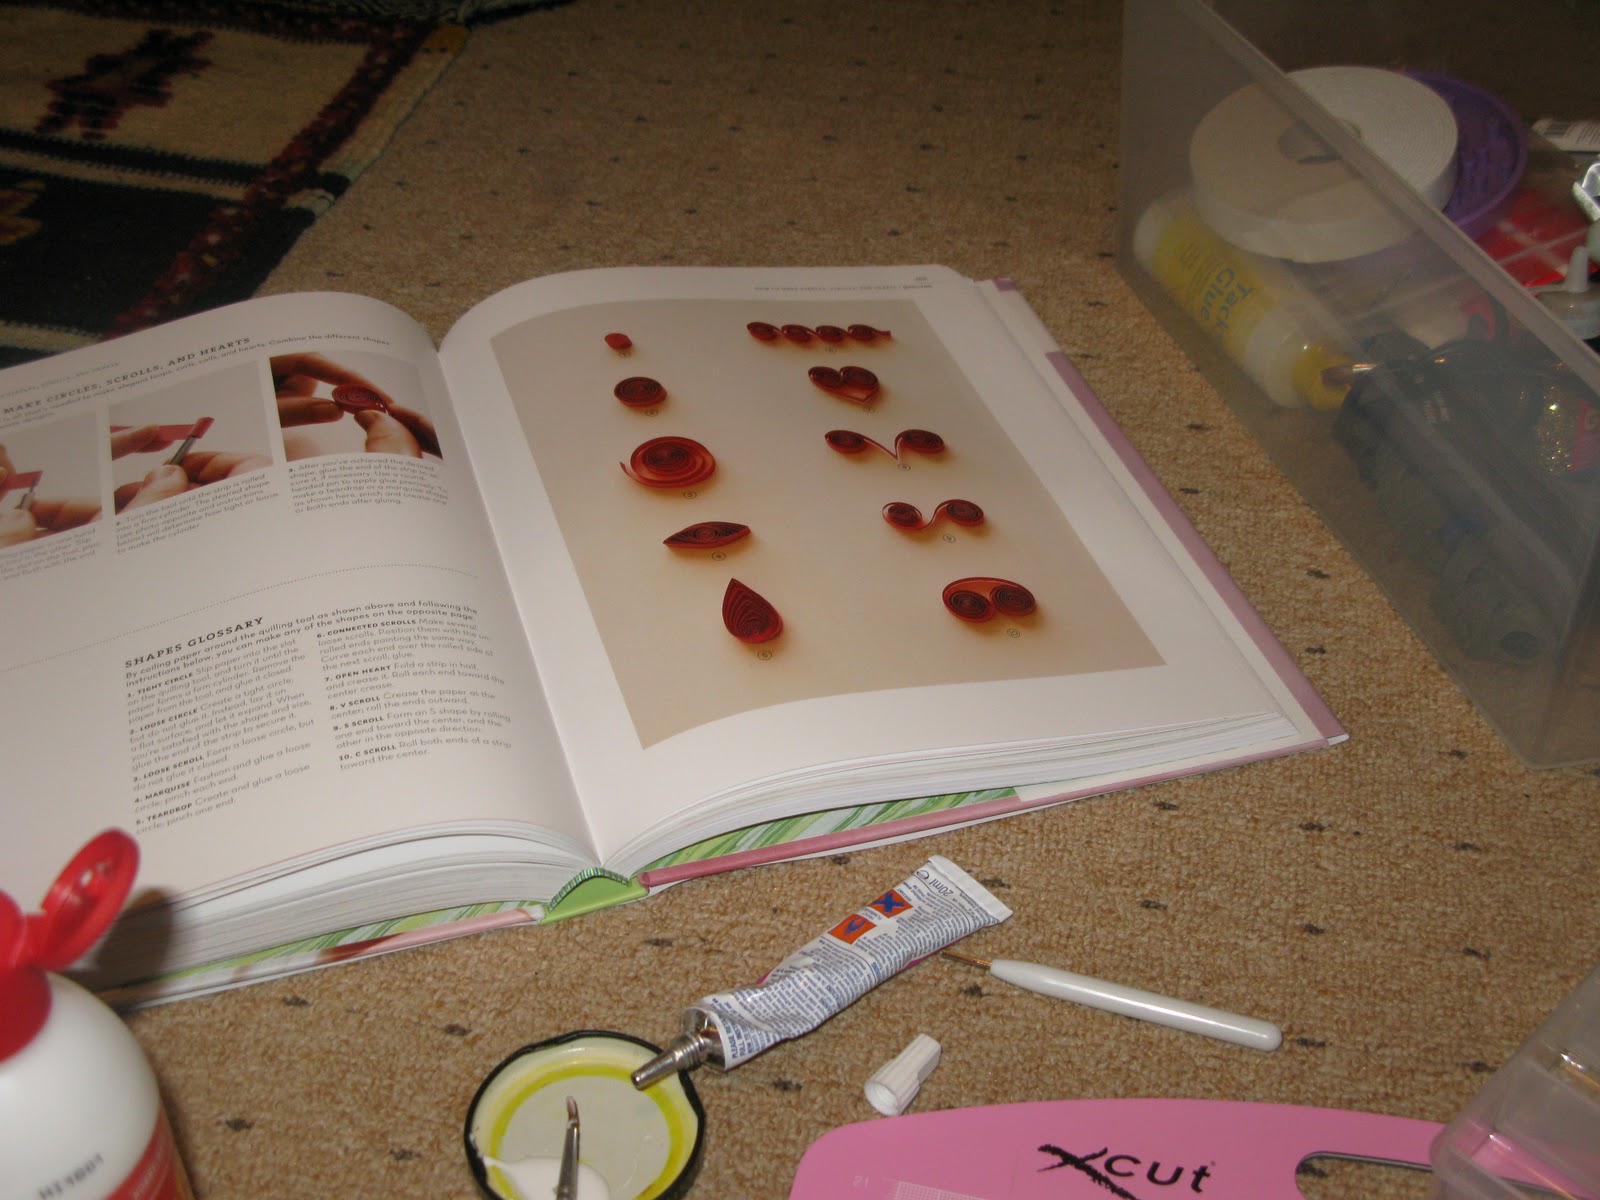
I also used it to store some of my smaller tools and basic materials including glue spreaders, foam pads, small craft knife, quilling tool and small alphabet stamps. The draws are all see through so I think this will make it much easier to find the particular embellishment or tool I am looking for each craft project.
Over Christmas Dunelm Mill had a sale as well as a further 20% of certain products, I took advantage of this by purchasing a mid size three draw system for only £7.99 which I have used to store larger tools, paper, cardstock and various glues, glitters, stamps and inks. It is completely full with a wide array of products all ready.


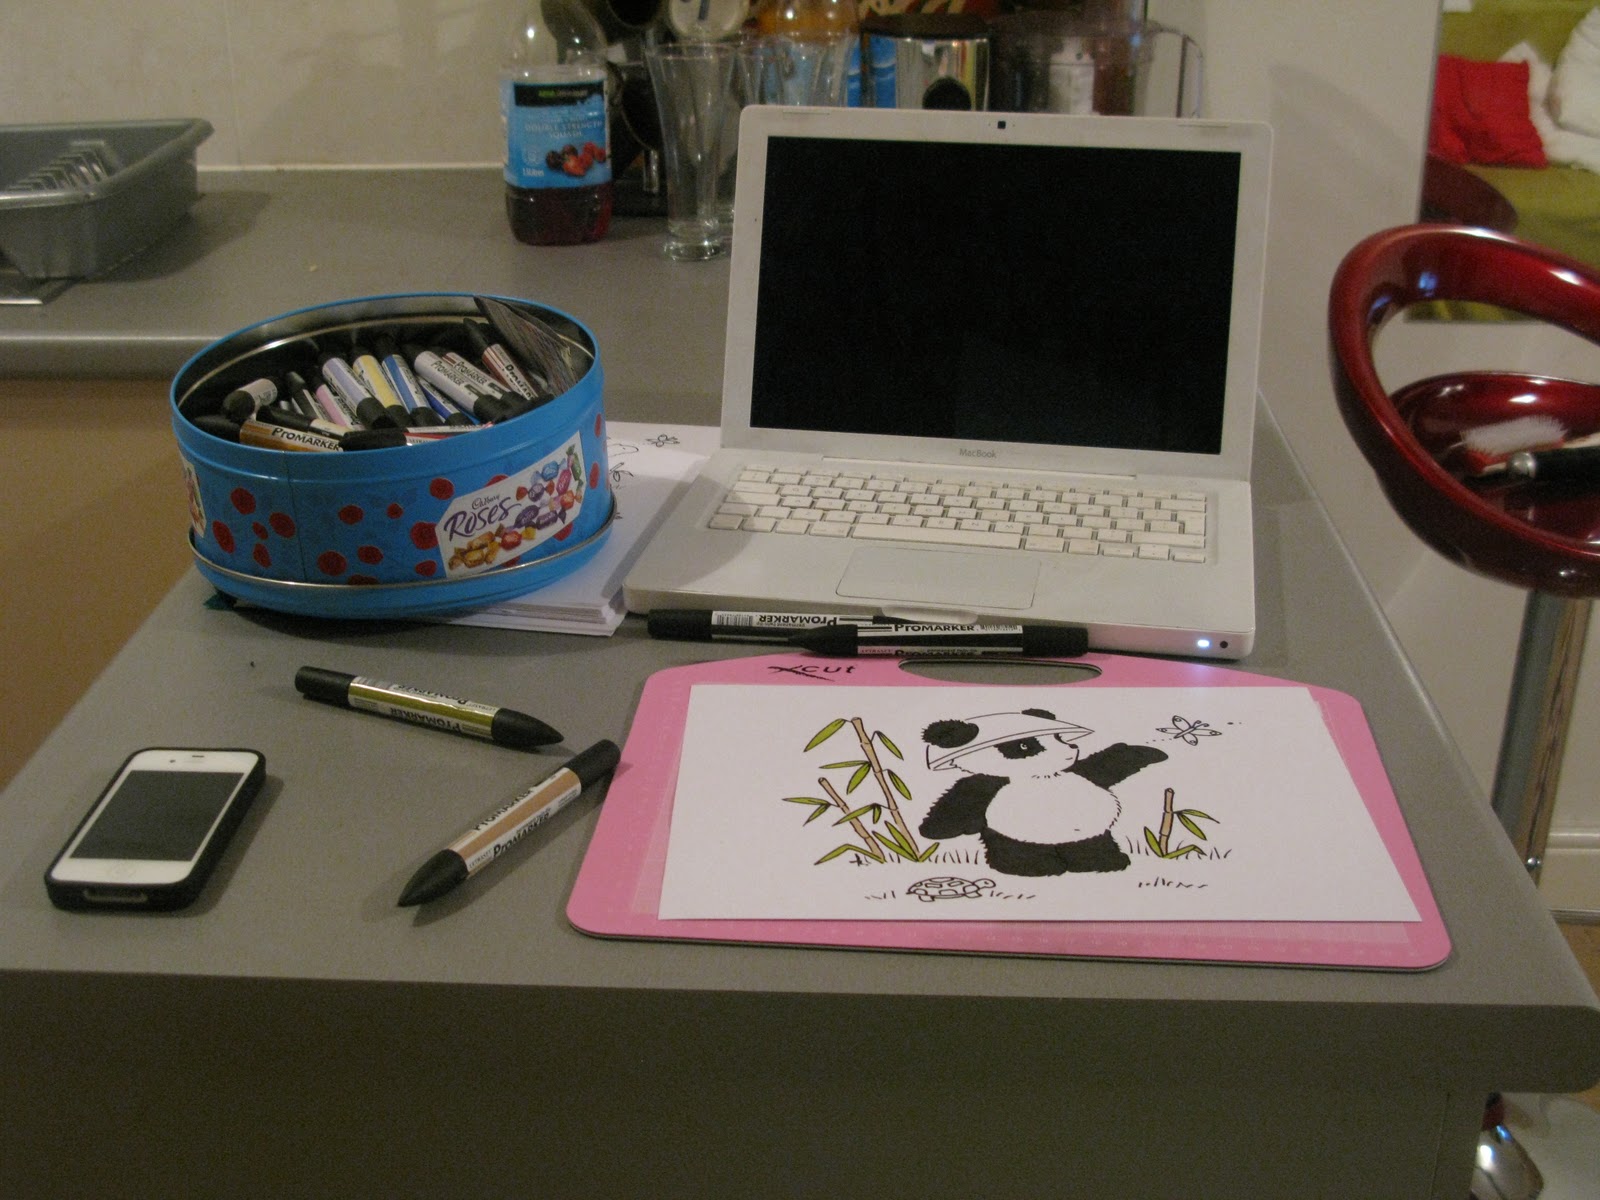
I still haven’t managed to store everything I have bought, I have 50 pro markers which are currently in a roses tin which is fine for keeping it tidy but makes things difficult when looking for a particular colour pen. I still have lots of paper which I have stored in a large wooden box and a number of balls of wool which are also in the same box; not to mention the enormous amount of magazines I have purchased over the last 2 months. At first I considered just removing the pages I was interested in and recycling the rest of the magazine but have actually changed my mind and decided to keep all the magazines as I think they will come in handy when looking for inspiration, information and instruction-now just need to figure out how to store them.