Just a quick post to show you all the mothers day card I have been working on for my gran. It's a pro marker coloured image of some teddy bears.
I mounted the image on some embossed dark card stock and put it on to a maroon coloured card. I added a stamped sentiment which I also mounted on some pink card stock. I decided the card looked a bit plain so added some glitter glue round the sentiment and some heart buttons to try and jazz it up a bit.
I'm still not sure its completely finished any suggestions to extra bits I could add.
Showing posts with label Papercraft. Show all posts
Monday, 5 March 2012
Decopatch Teapot
As I have mentioned in previous posts I am a craft magazine addict and a few weeks ago I purchased the womans weekly craft special.
One of the projects which I loved was a teapot made into a planter, in the magazine they had covered the teapot in strips of fabric. I decided to adapt this a little to make a gift for my Gran for Mothers Day.
I used 'Decopatch' papers to cover my tea pot and a cheap tea pot from wilko. I picked out three different papers that I thought went together, be warned decopatch papers seem to be super pricey I paid 3.79 per pack and each pack contains three sheets. The paper actually does go really far I havent finished one sheet of any of the three patterns on this project.
I cut up the papers into little squares, covered sections of the teapot in decopatch glue (I think PVA would work just as well) and put the squares on I then added another layer of the glue. I did this all over the teapot making sure to get into all the nooks and crannys.
I then left it to dry before adding to layers of glossy varnish to give the project a shine. I plan to put compost in the teapot and then plant a small pansy in it. As Mothers Day is a few weeks away I haven't planted it up yet so when I do I will pop and post and photo up of the finished article.
P.S again apologies for the quality of the piccys cant wait to have my camera back
One of the projects which I loved was a teapot made into a planter, in the magazine they had covered the teapot in strips of fabric. I decided to adapt this a little to make a gift for my Gran for Mothers Day.
I cut up the papers into little squares, covered sections of the teapot in decopatch glue (I think PVA would work just as well) and put the squares on I then added another layer of the glue. I did this all over the teapot making sure to get into all the nooks and crannys.
I then left it to dry before adding to layers of glossy varnish to give the project a shine. I plan to put compost in the teapot and then plant a small pansy in it. As Mothers Day is a few weeks away I haven't planted it up yet so when I do I will pop and post and photo up of the finished article.
P.S again apologies for the quality of the piccys cant wait to have my camera back
Wednesday, 18 January 2012
WOYWW 18th Jan
Last week I managed to visit pretty much all the WOYWW links over at Julia's brilliant blog I really enjoyed looking at the work everyone was getting started with in 2012.
I still have no proper crafting desk and this week for some reason I have been working on the floor its actually really comfortable and gives me plenty of space to make a mess in! So here's a look at what's going on on my desk/floor this week.
As you can see the floor has sort of been taken over with crafting. In the top left I have one of my storage boxes which I use to keep all my various adhesives and scissors and craft knives in. In the middle is one of my smaller storage boxes which contains my alphabet stamps and quilling papers. I also have two excellent craft books out one is Martha Stewart's craft encyclopedia and the other is Craft Wisdom and Know How. Both these books are perfect for newbie crafters lots of hints, tips, tutorials and fun projects to get started with. I also have my dinner in the top right I love to craft whilst chilling out over dinner hence the pizza in this photo.
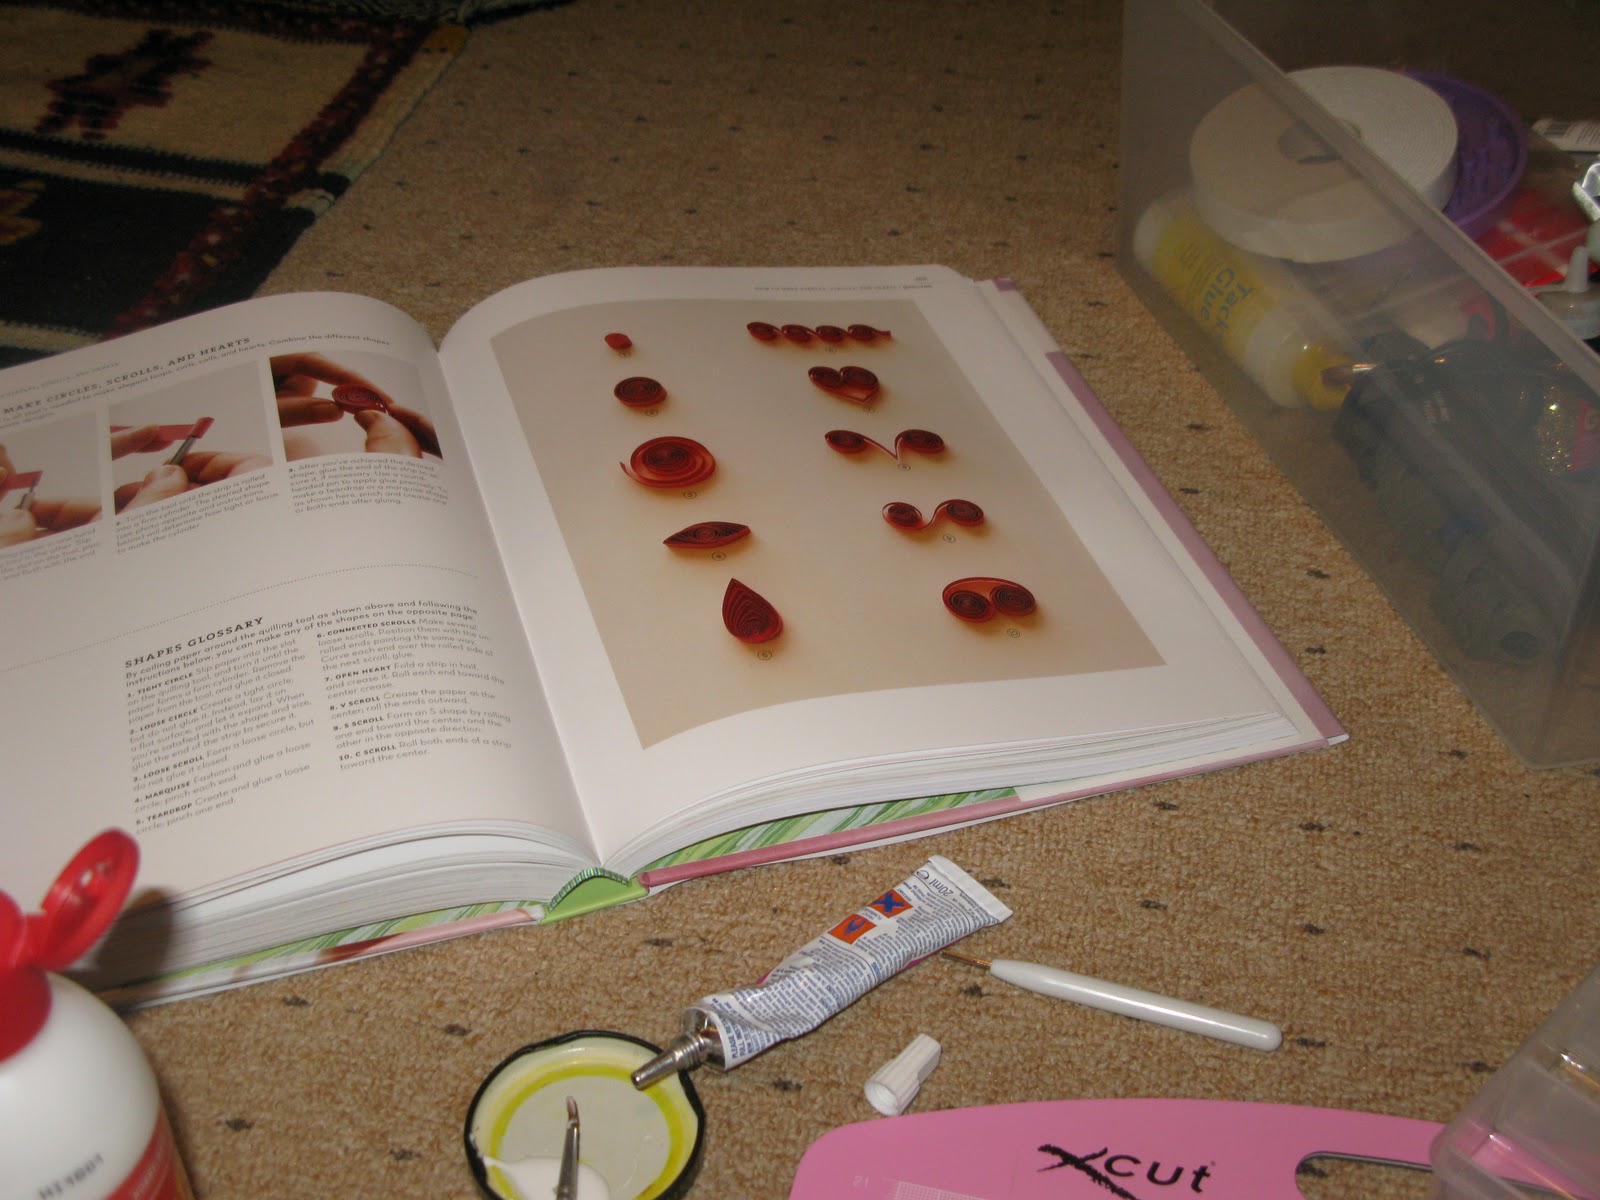
As you can see I had been reading about the art of quilling. It was a technique I had never tried before so decided that I would practice a few of the shapes that were shown in various books to see if I could get the hang of it before using it on a card, this way if I wasn't any good at it I wouldn't mess up a card. Both books offer step by step instructions for various shapes so I got my quilling papers out along with the quilling tool and started practicing.
The technique is a little fiddely but very fun to see how easy it is to make a whole range of shapes some more complicated than others. The 3D effect looks great too and I have tons of ideas of how I can use quilling on cards and other crafty makes now I have got the hang of it.
I made a wide range of different shapes including a flower, teardrop, scroll, heart and various circles. I think the effect is ace and cant wait to try different shapes and papers. So yes this week my desk is filled with quilling and for anyone that hasn't tried this technique yet give it a go it really is great fun. This is what I love so much about crafting such a huge array of new skills to learn and master, I look forward to getting round all your desks this week and finding new techniques, crafts and projects that your all doing and giving them a go myself.
I still have no proper crafting desk and this week for some reason I have been working on the floor its actually really comfortable and gives me plenty of space to make a mess in! So here's a look at what's going on on my desk/floor this week.
As you can see the floor has sort of been taken over with crafting. In the top left I have one of my storage boxes which I use to keep all my various adhesives and scissors and craft knives in. In the middle is one of my smaller storage boxes which contains my alphabet stamps and quilling papers. I also have two excellent craft books out one is Martha Stewart's craft encyclopedia and the other is Craft Wisdom and Know How. Both these books are perfect for newbie crafters lots of hints, tips, tutorials and fun projects to get started with. I also have my dinner in the top right I love to craft whilst chilling out over dinner hence the pizza in this photo.
As you can see I had been reading about the art of quilling. It was a technique I had never tried before so decided that I would practice a few of the shapes that were shown in various books to see if I could get the hang of it before using it on a card, this way if I wasn't any good at it I wouldn't mess up a card. Both books offer step by step instructions for various shapes so I got my quilling papers out along with the quilling tool and started practicing.
The technique is a little fiddely but very fun to see how easy it is to make a whole range of shapes some more complicated than others. The 3D effect looks great too and I have tons of ideas of how I can use quilling on cards and other crafty makes now I have got the hang of it.
I made a wide range of different shapes including a flower, teardrop, scroll, heart and various circles. I think the effect is ace and cant wait to try different shapes and papers. So yes this week my desk is filled with quilling and for anyone that hasn't tried this technique yet give it a go it really is great fun. This is what I love so much about crafting such a huge array of new skills to learn and master, I look forward to getting round all your desks this week and finding new techniques, crafts and projects that your all doing and giving them a go myself.
Wednesday, 11 January 2012
WOYWW
So last week whilst blog hopping I stumbled across this fantastic post where each Wednesday crafters from all over the world congregate on Julia's blog to share pictures of their work desks and the a particular projects they have on them on that Wednesday.
I only discovered the blog a few days ago and have to admit that I have been hooked ever since. It is so interesting to see how other people organise their work spaces, its also great to see that the people that post vary from novice crafters like me to some real craft artists whose work just amazes me.
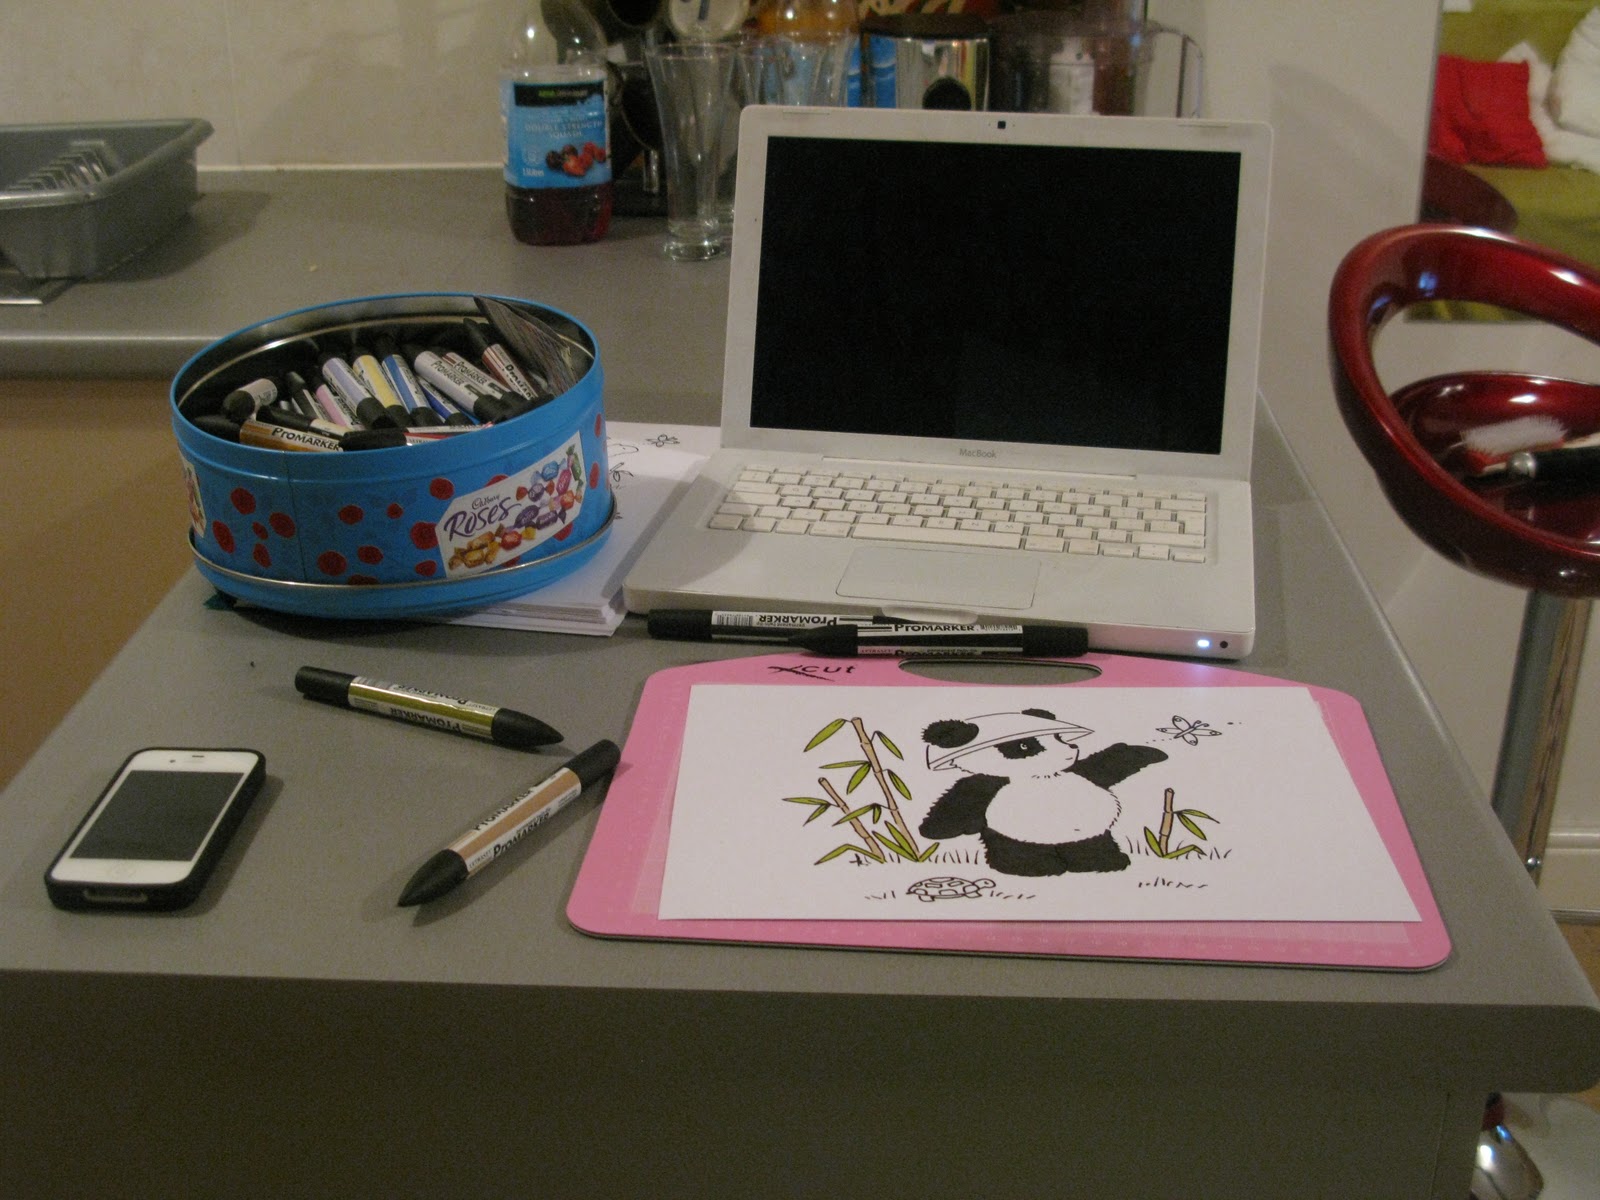
So far I don't actually have a desk solely for craft so kind of just spread out in the kitchen or lounge. This week I have been working on Thank You cards and decided to do something a bit unconventional so have done a thank you card with a panda on. As you can see from the first picture I used my large collection of pro markers to colour in the digi stamp.
As you can see from the above picture my desk gets a bit messy when I am fully immersed in a project. In the background you can see a pad of multi coloured card stock which I purchased in Lidl at the weekend it was a bargain at 1.99 for a pack of 25 sheets. You can also see my self healing cutting mat which I love I use it for everything not just cutting, it makes it much easier to tidy up when I am done if all the bits and bobs are on the mat. You can also see double sided sticky tape which I think every crafter is a little bit in love with, and my craft knife and scissors which I used to cut out all the elements of my digi stamp.
This is the final card not 100% happy with it but pleased as its the first card of this type that I have made. I used a digi stamp which I cut into individual elements and mounted them on different levels of my folded piece of card. The bamboo canes were fiddely to cut out so I don't think they look as neat as I would like. The sentiment circle I did in green and then added stamps I think it would look more effective in a purple colour rather then blending in with the foliage in the rest of the image. I added some glitter glue to the card to make it a bit more interesting. Overall I like the image but think the way I have set up the card could be better I think I would give it 6/10.
I look forward to looking at what everyone else has on there desk this Wednesday.
I only discovered the blog a few days ago and have to admit that I have been hooked ever since. It is so interesting to see how other people organise their work spaces, its also great to see that the people that post vary from novice crafters like me to some real craft artists whose work just amazes me.
So far I don't actually have a desk solely for craft so kind of just spread out in the kitchen or lounge. This week I have been working on Thank You cards and decided to do something a bit unconventional so have done a thank you card with a panda on. As you can see from the first picture I used my large collection of pro markers to colour in the digi stamp.
I store my promarkers in a old sweet tin and to be honest its not great it is hard to find which colour I am looking for and its impossible to keep the pens in colour groups which makes it quicker to get the colours needed for blending. Some sort of storage solution needs to be purchased asap.
This is the final card not 100% happy with it but pleased as its the first card of this type that I have made. I used a digi stamp which I cut into individual elements and mounted them on different levels of my folded piece of card. The bamboo canes were fiddely to cut out so I don't think they look as neat as I would like. The sentiment circle I did in green and then added stamps I think it would look more effective in a purple colour rather then blending in with the foliage in the rest of the image. I added some glitter glue to the card to make it a bit more interesting. Overall I like the image but think the way I have set up the card could be better I think I would give it 6/10.
I look forward to looking at what everyone else has on there desk this Wednesday.
Labels:
cardmaking,
digistamps,
Papercraft,
promarkers,
stamping,
stash,
storage,
WOYWW
Sunday, 8 January 2012
Thank You Card
I have started making Thank You cards for sending out to thank people for the lovely presents I got for xmas.
I used pro markers to colour in the image and used an old red xmas paper as well as the blue paper from the new Potabello Road paper collection. I cut the image out using pinking sheers to add a bit of interest to the edge of the image. I then stamped a sentiment using my new alphabet stamps. Overall really happy with this card its quite a simple design but I think its really effective.
I am entering this card into the passion for pro markers Thank You Card challenge. http://promarkerchallenge.blogspot.com/
I used pro markers to colour in the image and used an old red xmas paper as well as the blue paper from the new Potabello Road paper collection. I cut the image out using pinking sheers to add a bit of interest to the edge of the image. I then stamped a sentiment using my new alphabet stamps. Overall really happy with this card its quite a simple design but I think its really effective.
I am entering this card into the passion for pro markers Thank You Card challenge. http://promarkerchallenge.blogspot.com/
Stash Storage
As I mentioned in a previous post over the last two months I have amassed a huge amount of stash for a whole range of crafts. I seem to be one of those people that when I take up a hobby I really go for it.
I had been storing all this stash in various ice cream tubs and larger crates as well as just piled up on the floor. This meant it was right faff to find what I was looking for and wasn’t good for keeping things neat tidy and organised.
| Most of my stash in some sort of order |
Over Christmas I was lucky enough to receive a beautiful sewing box which I have used to store all my embroidery, cross stitch and sewing machine accessories in. This means it is much easier to locate exactly what I am looking for and all the threads are organised by colour and all the needles by size.
I also received a small draw system that included four draws that were all split into little sections. The sections were variable in size because you could move the dividers around to suit what you needed. The top of the draw section also opens up to reveal a large compartment.
| Sewing box |
I have used this to store embellishments of varying kinds and some stamping materials. I had amassed a huge amount of sequins, beads, buttons, stickers etc. which I split up into each of the sections.
I also used it to store some of my smaller tools and basic materials including glue spreaders, foam pads, small craft knife, quilling tool and small alphabet stamps. The draws are all see through so I think this will make it much easier to find the particular embellishment or tool I am looking for each craft project.
Over Christmas Dunelm Mill had a sale as well as a further 20% of certain products, I took advantage of this by purchasing a mid size three draw system for only £7.99 which I have used to store larger tools, paper, cardstock and various glues, glitters, stamps and inks. It is completely full with a wide array of products all ready.
I still haven’t managed to store everything I have bought, I have 50 pro markers which are currently in a roses tin which is fine for keeping it tidy but makes things difficult when looking for a particular colour pen. I still have lots of paper which I have stored in a large wooden box and a number of balls of wool which are also in the same box; not to mention the enormous amount of magazines I have purchased over the last 2 months. At first I considered just removing the pages I was interested in and recycling the rest of the magazine but have actually changed my mind and decided to keep all the magazines as I think they will come in handy when looking for inspiration, information and instruction-now just need to figure out how to store them.
Labels:
knitting,
needlework,
Papercraft,
stamping,
stash,
storage
Tuesday, 13 December 2011
First foray into card making
As I said in my about me section I am new to this whole craft thing. I decided to get started by trying to make my own Christmas cards. It is something I have always considered doing because I think people can really appreciate the effort that goes into making a card rather then buying one.
I decided to make my first card by cross stitching one of the small christmas kits that are available from Hobby craft for about £1.50. The cross stitching was fairly simple, I did a GCSE in textiles and it all seemed to come back to me. The cross stitching took me about a week on and off between work and was an excellent diversion on the train to work, although I think my fellow passengers thought I was a bit odd - but oh well.
Once I had finished the cross stitching I wasn't really sure about how to make it into a card so decided to go with something simple and cut an aperture out of some colored card, glued the cross stitch in and added a sticker sentiment to the front. It looked a bit plain after this so I decided to add a pipe cleaner round the edge of the aperture. Not entirely happy with the design think it looks a bit too handmade but for a first attempt I suppose it's not bad.
Subscribe to:
Posts (Atom)